Proper Grip Stance, and Trigger Pull for Your Handgun
Are you having a hard time hitting a target with your handgun? These tips from Dutch Mountain Armory can get you on target.
Todd Davis
|
Are you finding it difficult to hit a target with your new handgun? This is a common problem for many new gun owners. When you buy from a local gun shop like Dutch Mountain Armory, they take the time to show you a proper stance, grip and trigger pull before you leave. These fundamentals are not something to figure out as you go. Working on your form with an expert helping you is much easier. Let’s look a little further at the three fundamentals of accurate shooting.
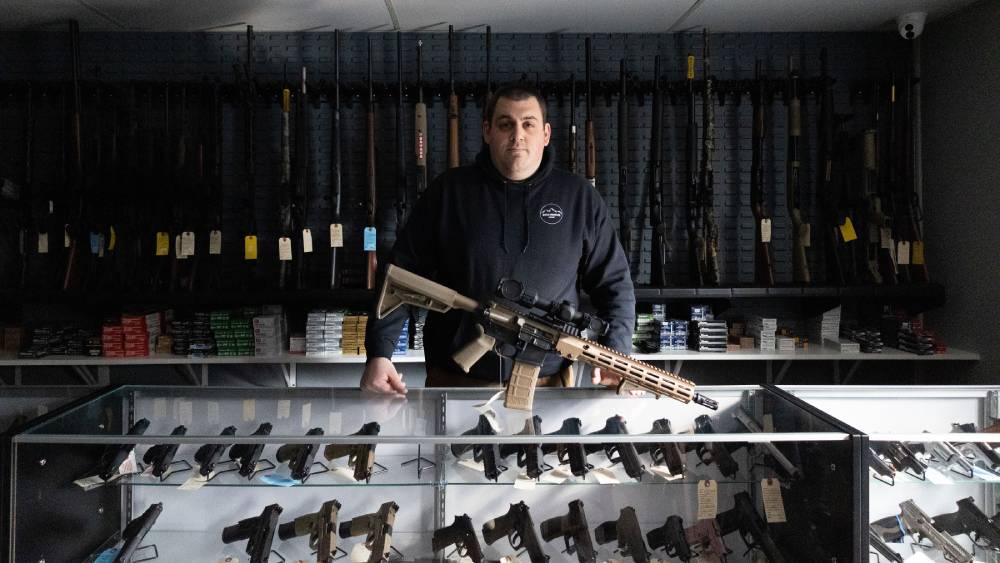
Dutch Mountain Armory, Owner and AR
Proper Grip Stance, and Trigger Pull for Your Handgun
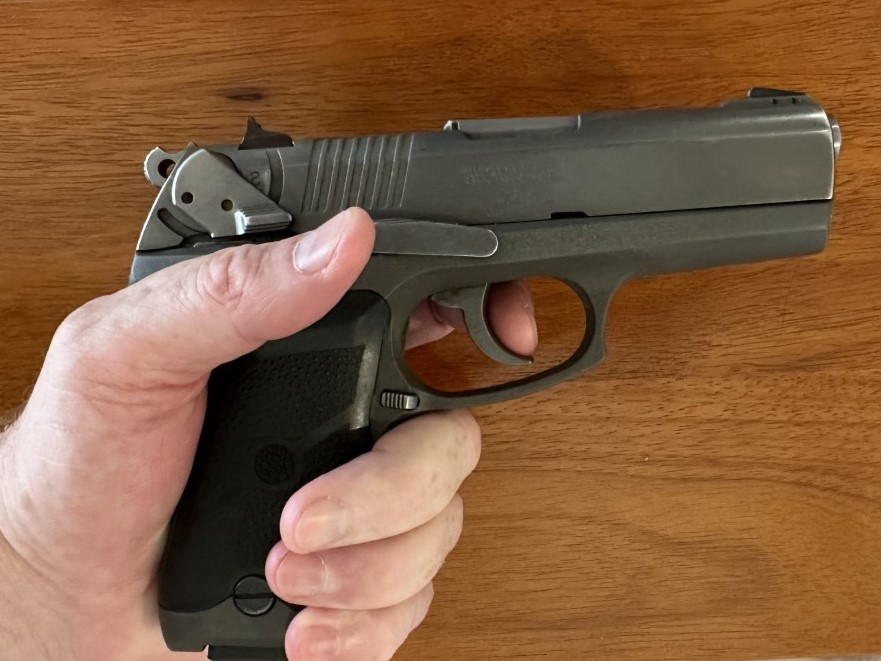
One of the most important aspects of accurate shooting is learning how to grip your handgun properly. A good grip is one that you don’t have to rebuild after every shot. It should be a grip you can repeat whenever you shoot your gun. It should also be a comfortable grip that can be maintained shot after shot.
The Proper Grip
One of the most important aspects of accurate shooting is
learning how to grip your
handgun properly. A good grip is one that you don’t have to rebuild after
every shot. It should be a grip you can
repeat whenever you shoot your gun. It should also be a comfortable grip that
can be maintained shot after shot.
Right Hand
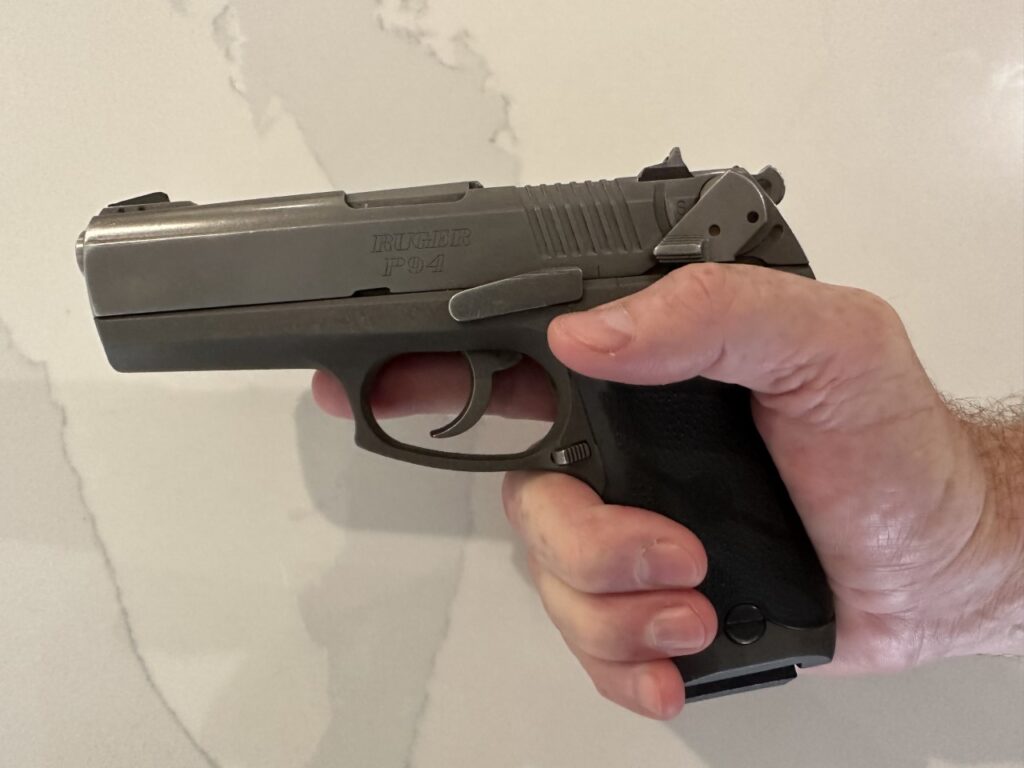
Start by picking up your handgun with your right hand. For now, keep your right index or trigger finger on the frame. You will wrap your other three fingers around the grip. Your thumb will be just under the slide and pointed forward along the frame. You want the web of your thumb tucked securely under the tang of the handgun.
Source: Davis Outdoor Adventures
Left Hand
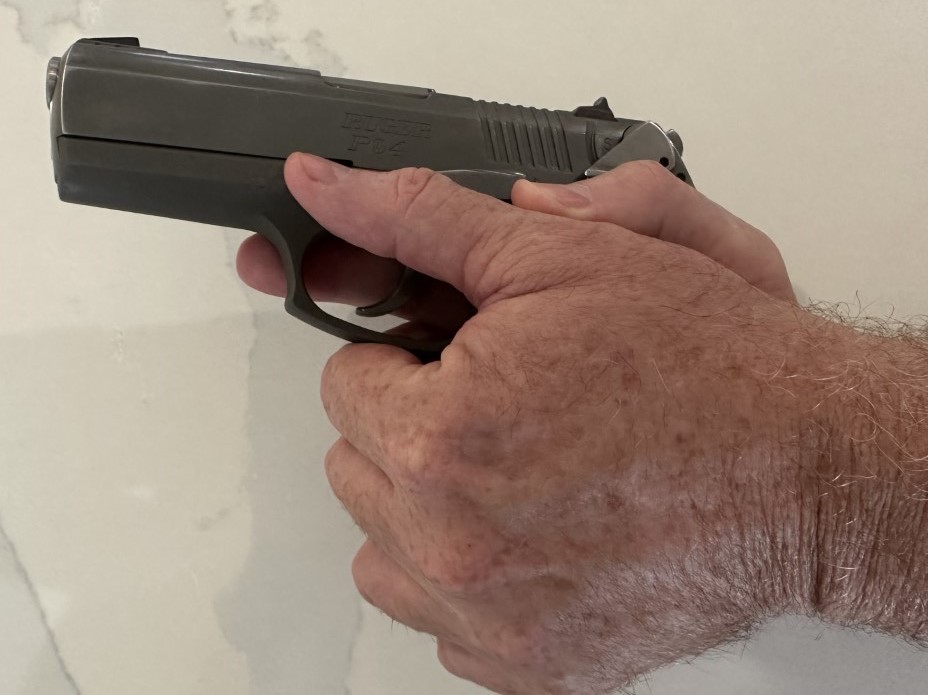
You will notice an opening on the grip between the index of the three fingers and the thumb of your right hand. The meaty portion of your left thumb will fit perfectly there, and your left thumb will be on the frame in front of your right thumb. The remaining fingers of your left hand will cup around the fingers of your right hand.
Source: Davis Outdoor Adventures
Pressure
To better handle the recoil of your handgun, you will need to apply pressure to limit the recoil. The push-pull method is a great place to start. With your shooting/trigger hand, push the handgun forward into your left hand. With your left hand, pull the handgun backward into your right hand. You want your left hand to squeeze about 70 percent and your right hand to be 30 percent. This will let you handle the recoil while making a nice smooth squeeze of the trigger.
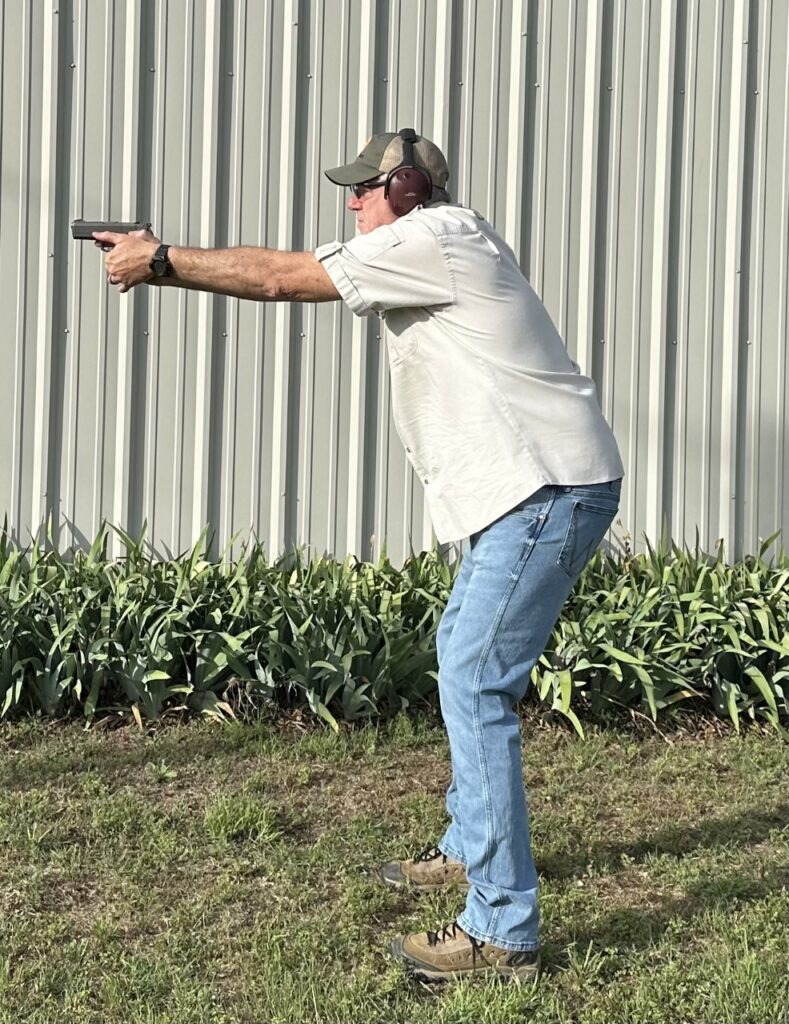
A Proper Stance: It's All in the Alignment!
A shooter can choose many different stances, but they are all variations of the Weaver and Isosceles stance. Both are good choices, and many find a combination of them both works well. Your local gun shop can help you decide which stance is the most comfortable for you. The more comfortable your stance, the more accurate you will be. Let’s discuss the two stances for a right-hand shooter. If you are left-handed, you will need to reverse the steps.
The Weaver Stance
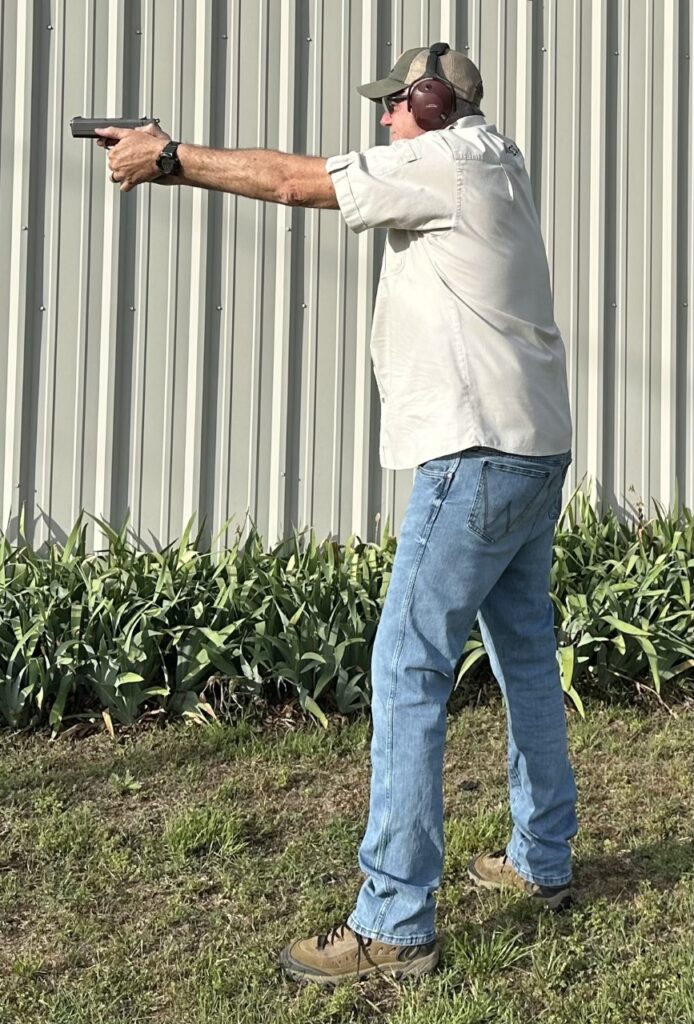
The Weaver Stance originates back in the 1950’s by a California deputy sheriff Jack Weaver. He often competed in freestyle pistol competitions and a developed two-handed stance that he could shoot accurately from.
Source: Davis Outdoor Adventures
The Weaver stance is much like a boxing stance. Shooters have their forward non-shooting foot in front of their shooting foot. For instance, a right-handed shooter will have their left foot forward and right foot six to eight inches behind their left. The toe of their non-shooting or right foot pointed outward 45 degrees.
The shooter’s forward knee slightly bends with 60 percent of their weight on that leg. The non-shooting knee is almost straight, with 40 percent of the shooter’s weight on the rear leg. The upper torso is bent slightly, and the gun points at the target with a two-hand grip. Your shooting arm or right arm fully extends, but the elbow is not locked. Your non-shooting arm or left arm is bent at the elbow as well.
Your grip is the same as we discussed earlier, but many who use the Weaver stance use a push-pull technique. The right hand is pushing the gun into the left hand, while the left hand is pulling the gun into the right hand. This makes for a very rigid stance. Because the Weaver stance causes the shooter to absorb a lot of the recoil, this stance is great for those with much of upper body strength. You may have to try this stance to see if you can live with the recoil.
The Isosceles Stance
The Isosceles stance has both feet shoulder-width apart. If you drew a straight line, the toes of both feet would touch the line. Distribute your weight is evenly across both feet. You want to be on the balls of your feet.
There is a slight bend to each knee. Your bottom is out slightly, and you bend at the hips. You want your nose right over your knees. You don’t want to lean forward too much. You still need to keep your balance and stay relatively comfortable.
Round your shoulders forward and extend both arms fully, but do not lock your elbows. This stance will absorb the recoil better than the Weaver stance, and your peripheral vision is better. A right-handed shooter in the Isosceles stance is much more likely to see a target to their left than a shooter in the Weaver stance.
Trigger Pull
The first concept to master with trigger pull is to find a comfortable spot on your trigger finger to put the trigger. For most shooters, this is the center between the end of your finger and the first joint. This part of your finger is flat and allows you to make a smooth pull without pushing or pulling the end of the muzzle.
Source: Davis Outdoor Adventures
Too Much Finger
If too much of your finger sticks through the trigger guard, your shots will tend to be low. It causes you to drop the muzzle of your handgun. It can also cause you to miss to the right. If you are missing low and right, you need to check your trigger finger alignment.
Not Enough Finger
If you only put the tip of your trigger finger on the trigger, you will have the reverse effect. You will notice your shots are hitting left. It is because you are pushing the muzzle of your handgun to the left. If you notice shots are missing to the left, make sure you have proper trigger finger alignment.
The Pull
After you have the position of your trigger finger correct. You will want to pull deliberately and smoothly to the rear. You do not want to jerk or snap your finger back. You want a smooth pull. A local gun shop like Dutch Mountain Armory can teach you how to safely dry-fire your handgun. This drill is cheap since no ammo fired, and can be done at home. Competitive shooters will dry-fire their handguns thousands of times a year.
In Summary
Once you have bought your handgun, it’s time to have fun. All you need to do is practice, practice, practice. You will be much more accurate when you learn the basics, grip, stance, and trigger pull. If you want a second set of eyes to ensure your form is good, stop by a local gun shop and let them watch you dry-fire a few times. Places like Dutch Mountain Armory are always there to help.